Report: Deep Sea Robotics
I define my research as the development of underwater environments and models using Gazebo Simulator. Specifically, the aim of my research was to create a robot model that could withstand deep sea pressures. However, as the semester went by and technical difficulties arose, my research devolved into more of an exploration of the UUV simulator while learning how to use new software and operating systems such as Gazebo Simulator, Github, Blender, and Linux. Although I did not get as far as I had hoped on my research, I developed an initial prototype to the model and altered the existing UUV simulator environment.
Setting Up
With no previous experience using Gazebo and Linux, I devoted a lot of my time in the first few weeks to downloading and differentiating between Linux distributions. After experimenting with Ubuntu and Linux Mint, both of which are Linux distros, I opted to use Ubuntu which proved much easier to download and run Gazebo.
Environment Changes/understanding UUV Simulator
After downloading Gazebo, my first step was to create or find a suitable underwater environment. Unlike most other environments, Gazebo does not have a very in-depth default underwater environment, so I used the UUV simulator. The UUV simulator is a “set of packages with Gazebo plugins and ROS modules to enable simulation of underwater vehicles” (Manhães 2018) . After installing the simulator and the proper ROS distributions, I played around with the provided environments; I settled with using the empty_underwater_world as the base.
I tested the buoyancy of the simulator by making sure objects sunk when denser.
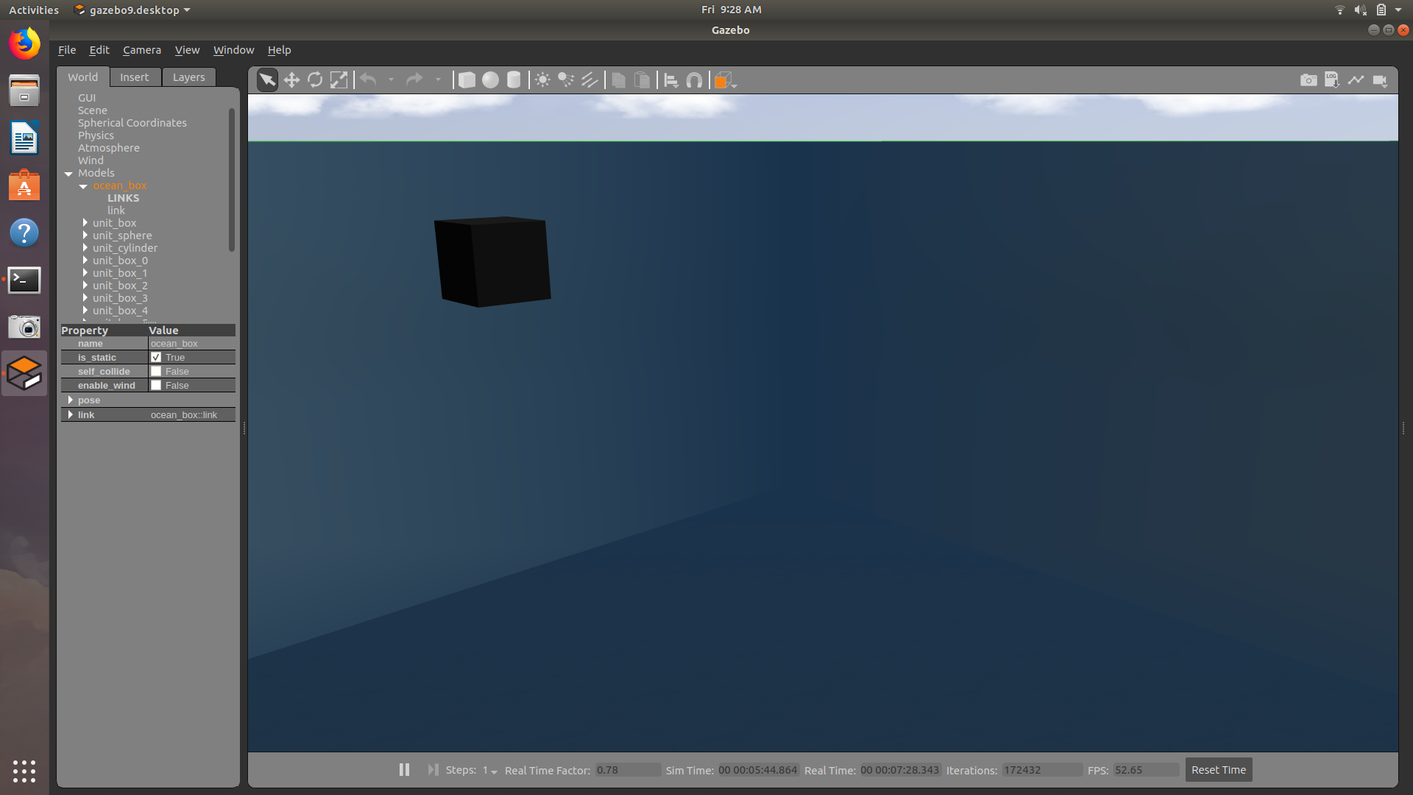
Figure 1: Sinking cube.
Going into the research, I knew I wanted to make my focus more about the deep sea. Because of this, I would have to alter the default depth of the simulator. To do this, I expanded the pose and collision of each of the “walls” of the sea.
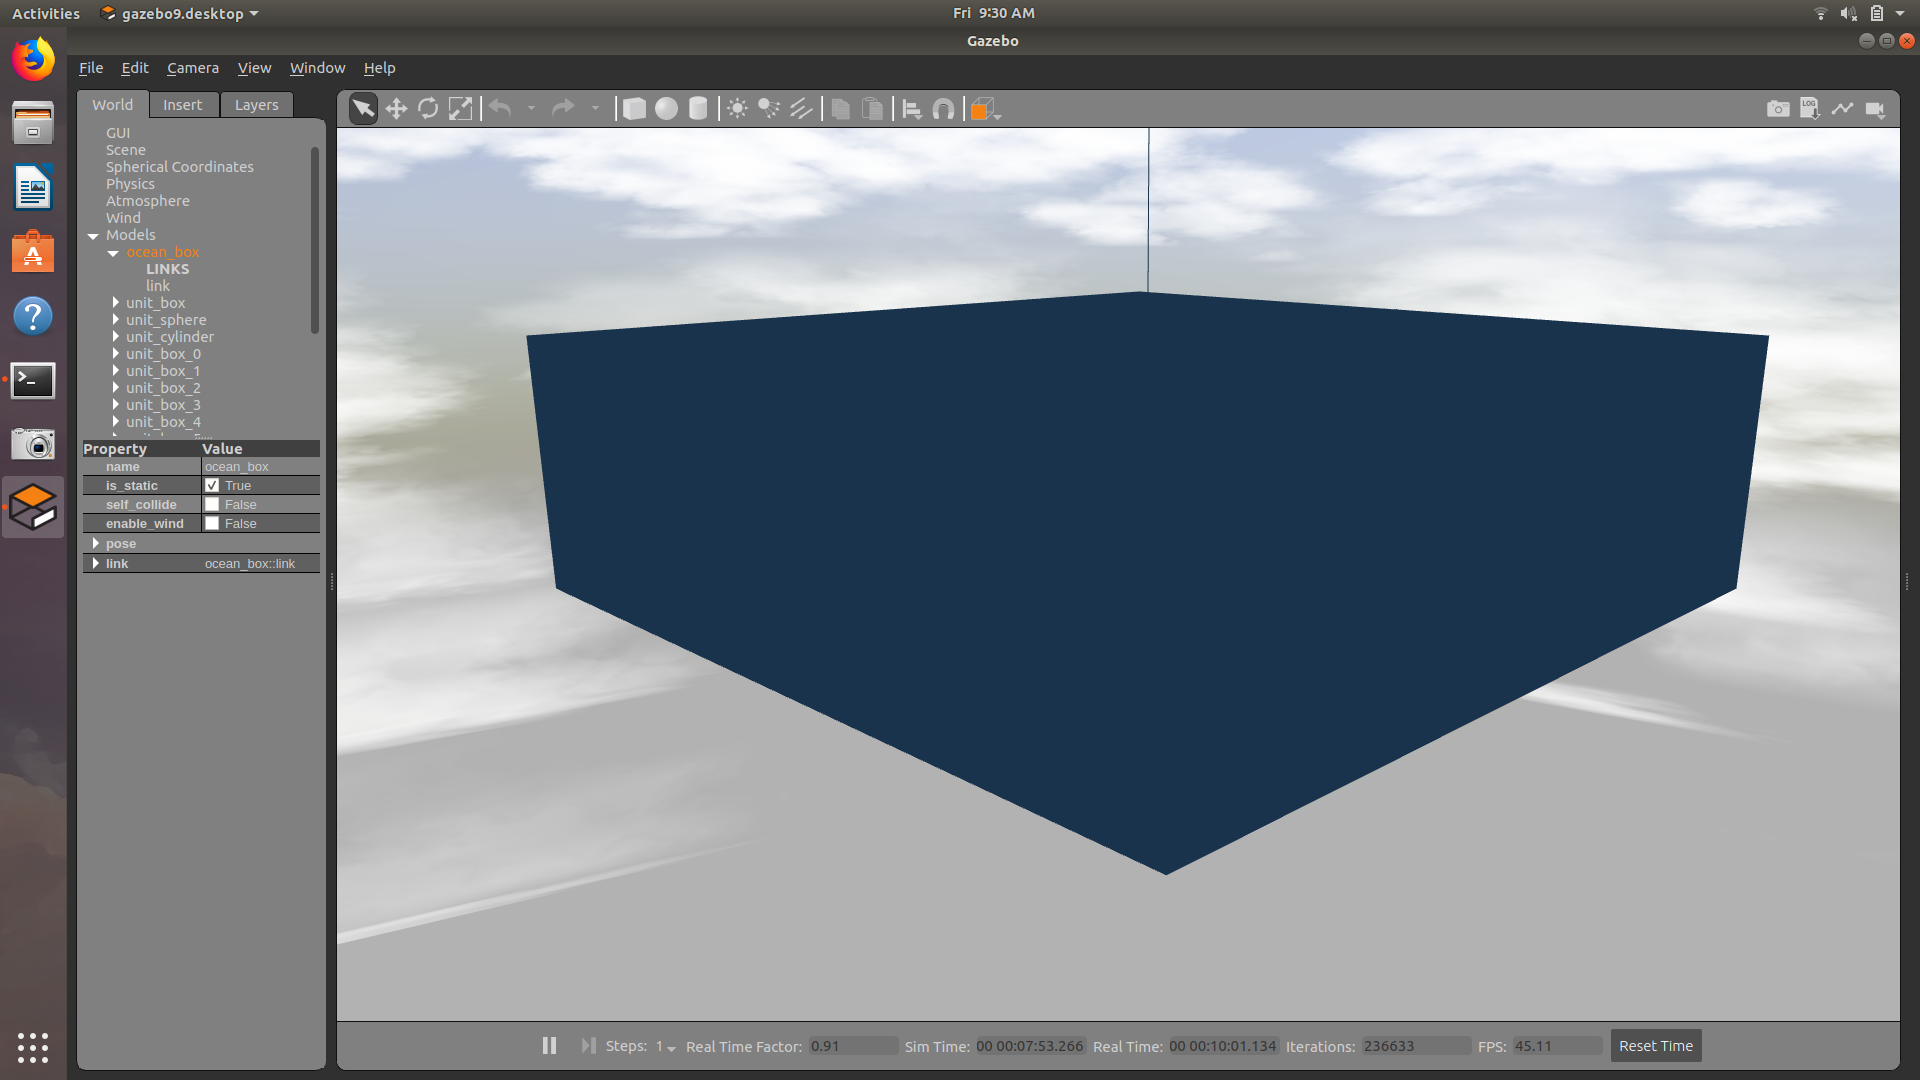
Figure 2: “walls” of the sea.
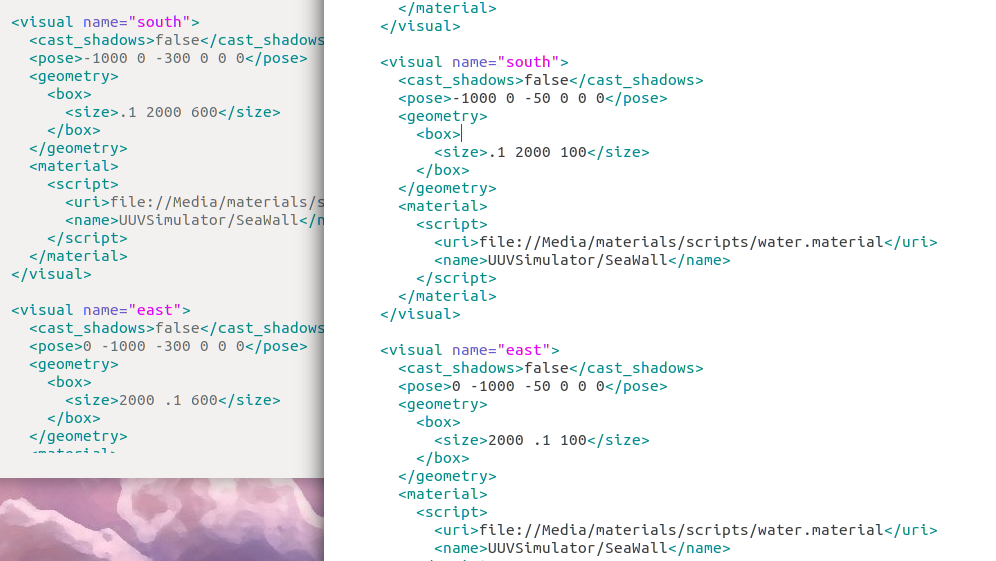
Figure 3: Altered pose numbers vs. original.
Building Initial Model
To create my initial mode, I used Blender. Never having used Blender before, it took me a while to get comfortable with the controls and build 3-D shapes. While deciding what shape to use, I learned a lot about different shapes that comprise manmade underwater vehicles such as submarines, cameras, and more. Some interesting things that I came upon included the pressure.
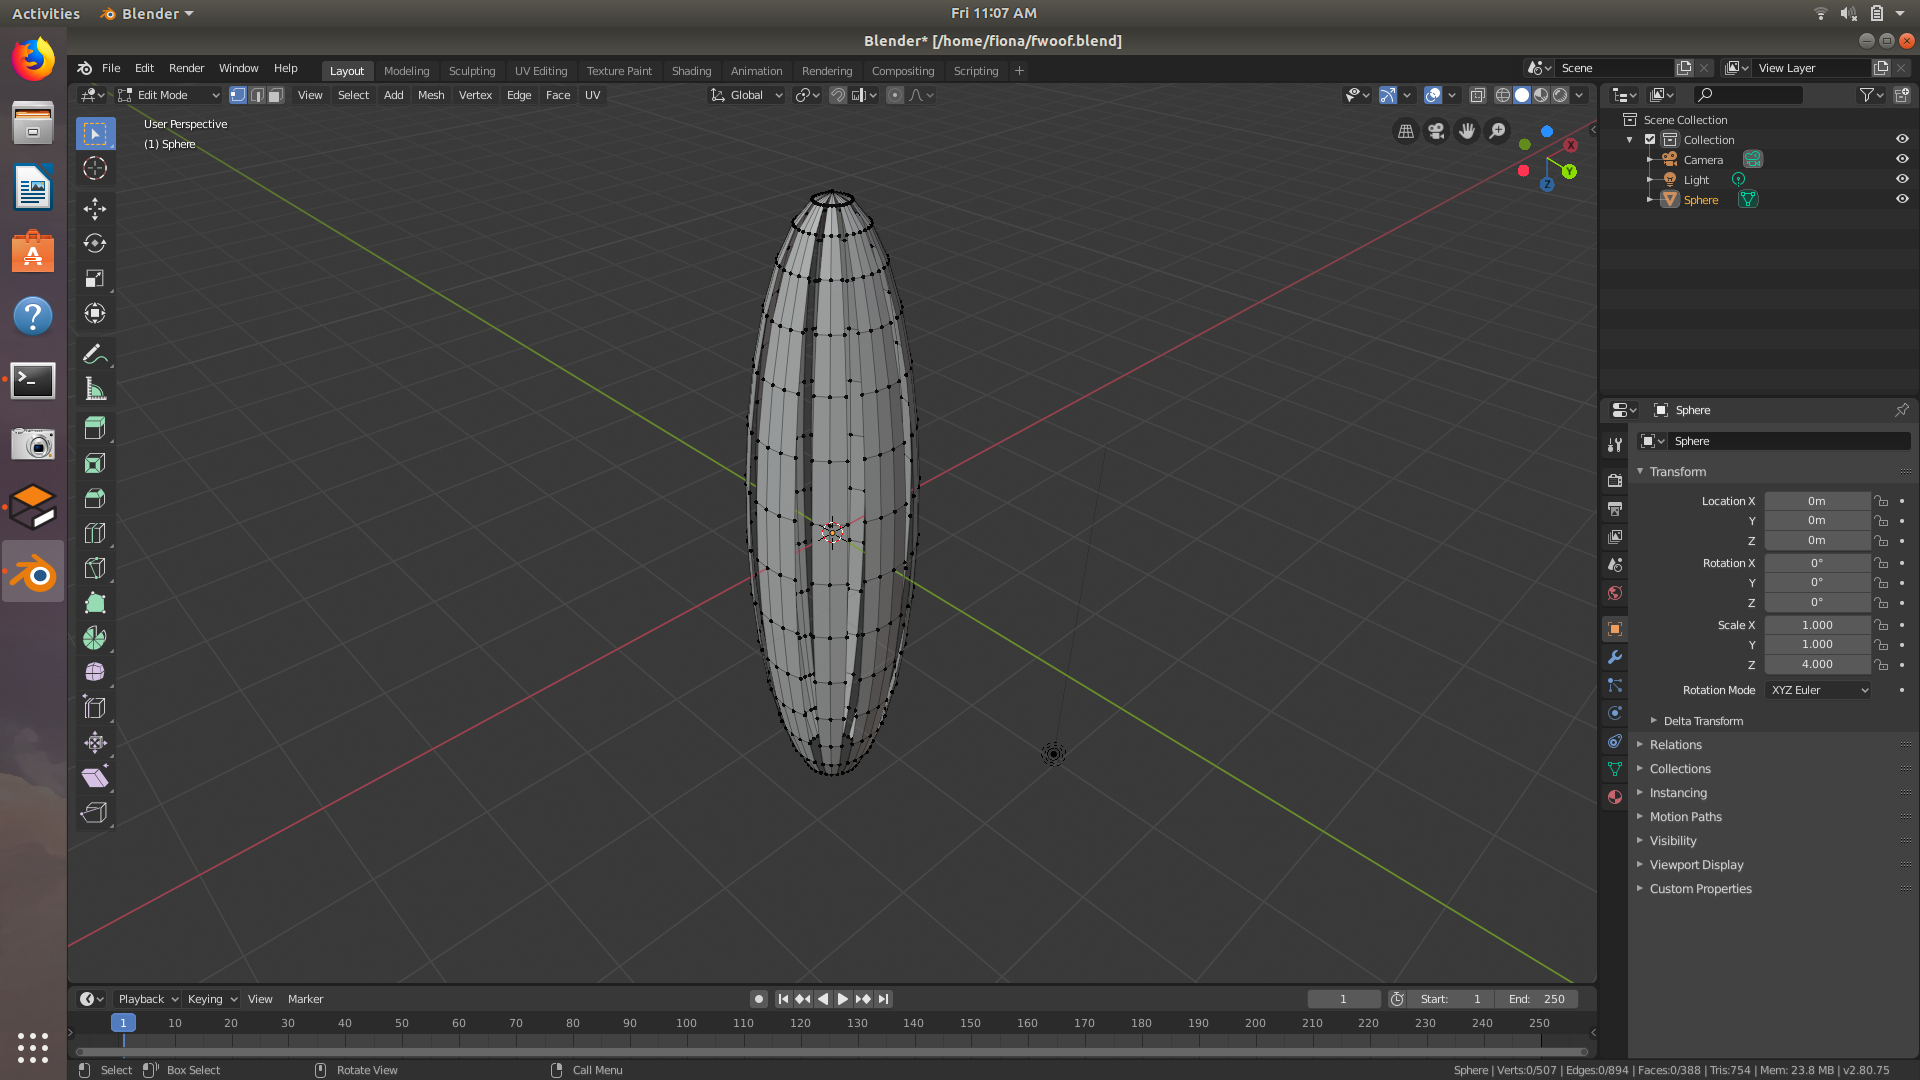
Figure 4: Part of the model in Blender.
Figure 5: Final model sinking.
Going Forward
Going forward in this project, several of the issues I want to work on are the robot dealing with and interpreting pressure. It does not seem as if the original simulator has pressure built into it. I also want to work on making the robot more independent.